


This is mainly because @Nighthorn(Blackweb) wanted to know how I do it, but if anyone else wants to try, please do!! let's start:
First, let's pic a reference photo:

ok! now that we have our reference pic, time to start drawing!

step 1: draw a slightly tilted half circle on your paper (it's gonna be the cheekbone). This will begin to determine the angle the head is held at.

step 2: draw a line coming from the half circle, and another one above the cheekbone and line, using the picture for reference on how much higher it is above the cheekbone. Also use the pic to determine the angle of the line, if it's slightly curving out, like an andalusian horse, it's called a roman nose, and if it's curved downward, it's the kind of nose an arabian horse has (I'm using horse breeds as references because that's how I think and understand stuff, if that doesn't make sense to you just let me know).

step 3: draw a line curving downward from the top line, and matching up to the end of the bottom line. This is going to be where the nostril is.

step 4: draw a kinda triangular shape connecting to the jawline, this is the chin. With the nostril line, bring it farther down and have it go a tiny bit above the chin, then draw a straight line for the mouth. Give the mouth a small curve, just so it's not like: "STRAIGHT LINE, BAM! MOUTH!" because that would look weird XD

step 5: draw a tear shape for the nostril, idk why the picture is at that angle, but it is and idk how to fix it XD
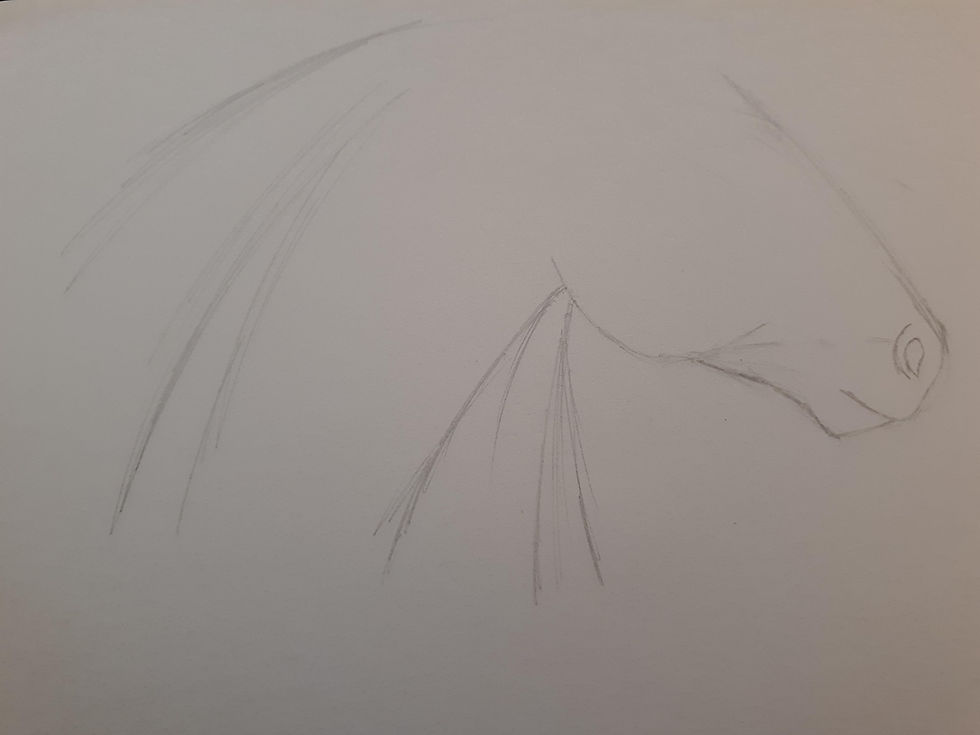
step 6: draw a small curved line outside the nostril, and start playing around with neck positions. Just draw a couple of lines to see the MANY different angles horse can hold their heads at. Make sure the neck is an average width (use the reference picture for this).

step 7: Once you're happy with the position of the head and neck, erase the extra lines that aren't needed.

step 8: At the top of the head, draw a sort of curvy shape, that dips down to a point at the top. this is the start of the ear.

step 9: draw a straight line next to the curvy line to make an odd looking triangle.

step 10: (again, idk why the pic is at this angle) Draw another line connecting to the top of the triangle, this is the inside of the ear. Repeat the exact same process a little bit in front of the other ear, this is the second ear.

step 11: for the eye, draw a curved triangle shape. The front of the eye should meet up or be close to the front of the cheekbone, just above it. Use the reference picture to help.

step 12: draw a curved line connecting both corners of the eye.

step 13: draw the forelock. I just like to do a bunch of wavy lines going down the side of the face. The great things about drawing horses/pegasi is that if you don't like the way the eye looks, or just don't want to draw the eye, you can draw the forelock over it and NO ONE knows!!! (I do this ALL the time XD)

step 14: (odd camera angle again, sorry) Draw the mane. You can have it long, short, wavy, straight, whatever you want. Make sure it matches the forelock in wavy/straightness, though.
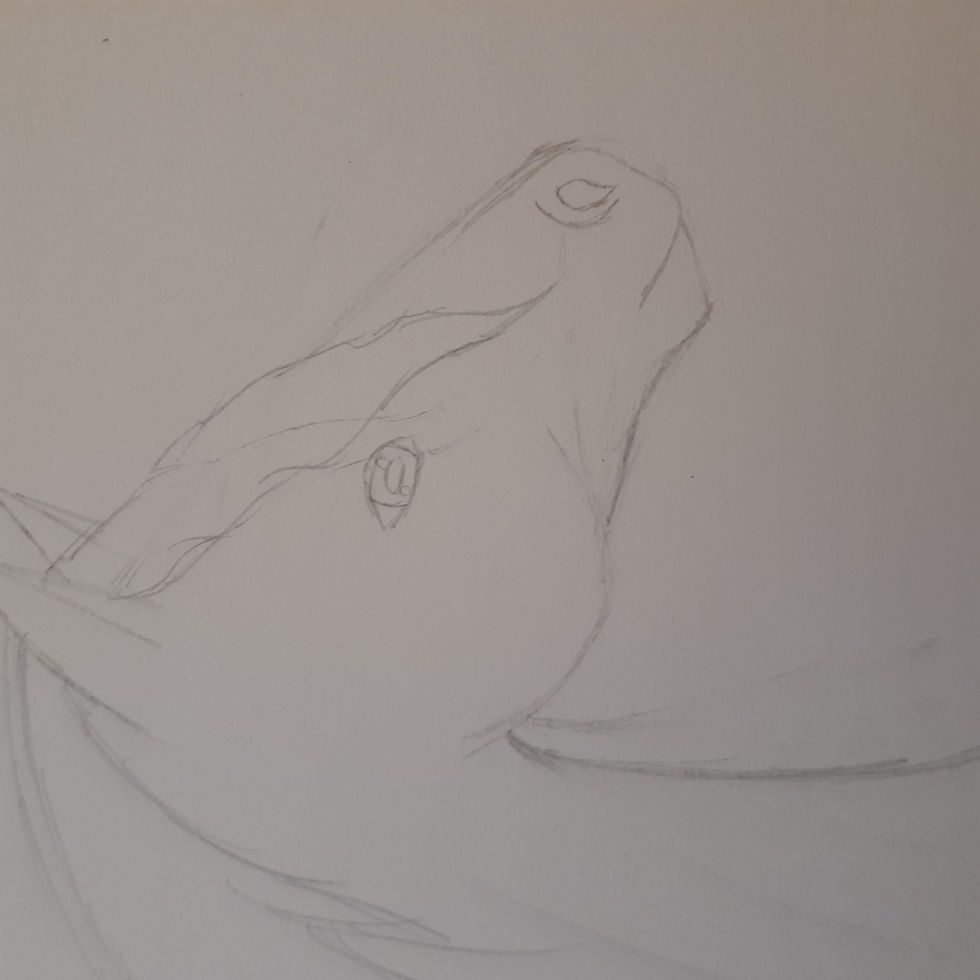
step 15: add detail to the eye. Draw two curved lines equal distance apart, (or just a circle if you want) and then a long oval-ish rectangle shape. This is the pupil. Then do two small circles, in opposite corners of the eyeball, these are where light is hitting the eye, and really helps bring it to life.

step 16: Time to start shading!!!! I used my charcoal pencils for this, just because I really like using them, but pencils work the exact same, so you can use those too. Start underneath the cheekbone, I find that that's one of the easiest places to start shading, then go along the jawline, fading the lead so it blends easier.

step 17: then do the chin and underneath the mouth. I don't draw lines in pen when I'm doing charcoal, so you need to heavily rely on shadows and light to give it definition. If you want to use a pen to outline and define everything, definitely do it.

step 18: start shading the nose, neck and other side of the cheekbone, underneath the mane, some veins, and muzzle. also along the top of the cheekbone if you want. I occasonially shade it, sometimes I don't, it kinda depends on my mood XD

step 19: shade the neck, and neck muscle, remember to transition from the pencil to the white paper, it makes everything so much easier to blend.

step 20: draw darken the lines that defined the eyeball, we're now going to shade it.

step 21: color in the pupil as dark as you can.

step 22: color in the rest of the eye, leaving out the small circles in the corner. Remember, those are where the light hits the eye, and it helps bring the drawing to life.

step 23: SMUDGY TIME!!! XD You can use a Q-tip, a paper towel, your finger, toilet paper, etc to blend everything. DO NOT blend the white circles in the eye though. leave those alone.

step 24: it should look similar to this after blending.

step 25: add shadows and highlights anywhere that needs it.
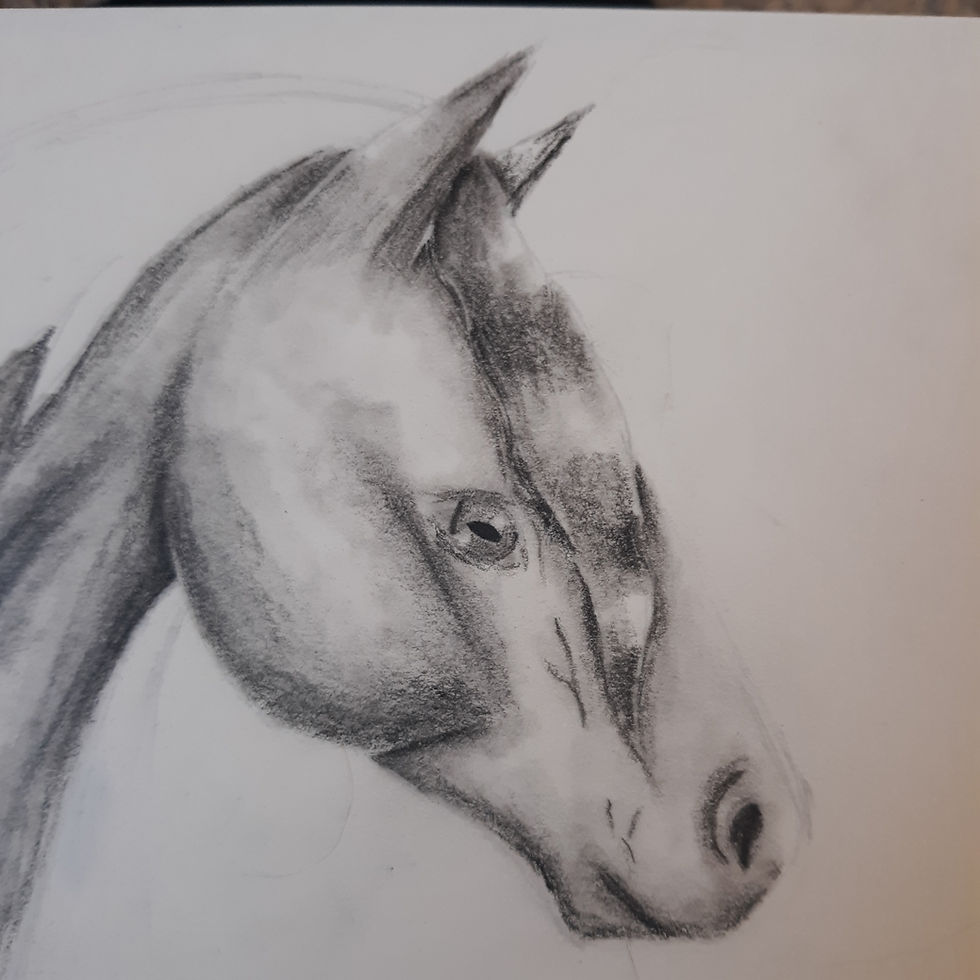
step 26: shade the forelock using the same method as with the body, anywhere that could block light, put a shadow.

step 27: draw some thin lines going in the direction of the mane, these are individual hairs (you don't have to do this part if you don't want to and are happy with how it looks without it).

step 28: do the exact same thing with the forelock to the mane, shading it in, adding hairs if wanted, adding additional shadows where needed.

Here's the finished product!! (I got lazy toward the end and didn't want to do a bunch of hairs on the mane so sorry bout that.....) It may seem complicated because there are so many steps, but trust it, it's not as complicated as it seems. It can take me a couple days to work on a drawing, but that's just because I have school and homework, and I'm an extreme perfectionist, I've literally spent multiple days just trying to get a leg right XD
hope this works for anyone who tries it!!
k but what happened to the muzzle on this drawing? loll I really just gave up on the shading for this didn't I XD if anyone sees this, just know that this was like *counts backwards* ermmm..... 7 months ago?? I think?? anyways, this is no longer how I draw horses XD I might make an updated tutorial is I have time/feel motivated to.... but that could be anywhere from 1 week to 1 year from now XD
Great job! This is super helpful and easy to follow!
thanks i think mine looks decent
cool!!